The invitation establishes a teaching relationship. Choose the route for the learner before deciding which email address to use.
Adult learner
Open Students and start the student invitation flow. Enter the learner’s details, choose the adult learner route and check the recipient carefully. Review the proposed arrangement before sending the invitation.
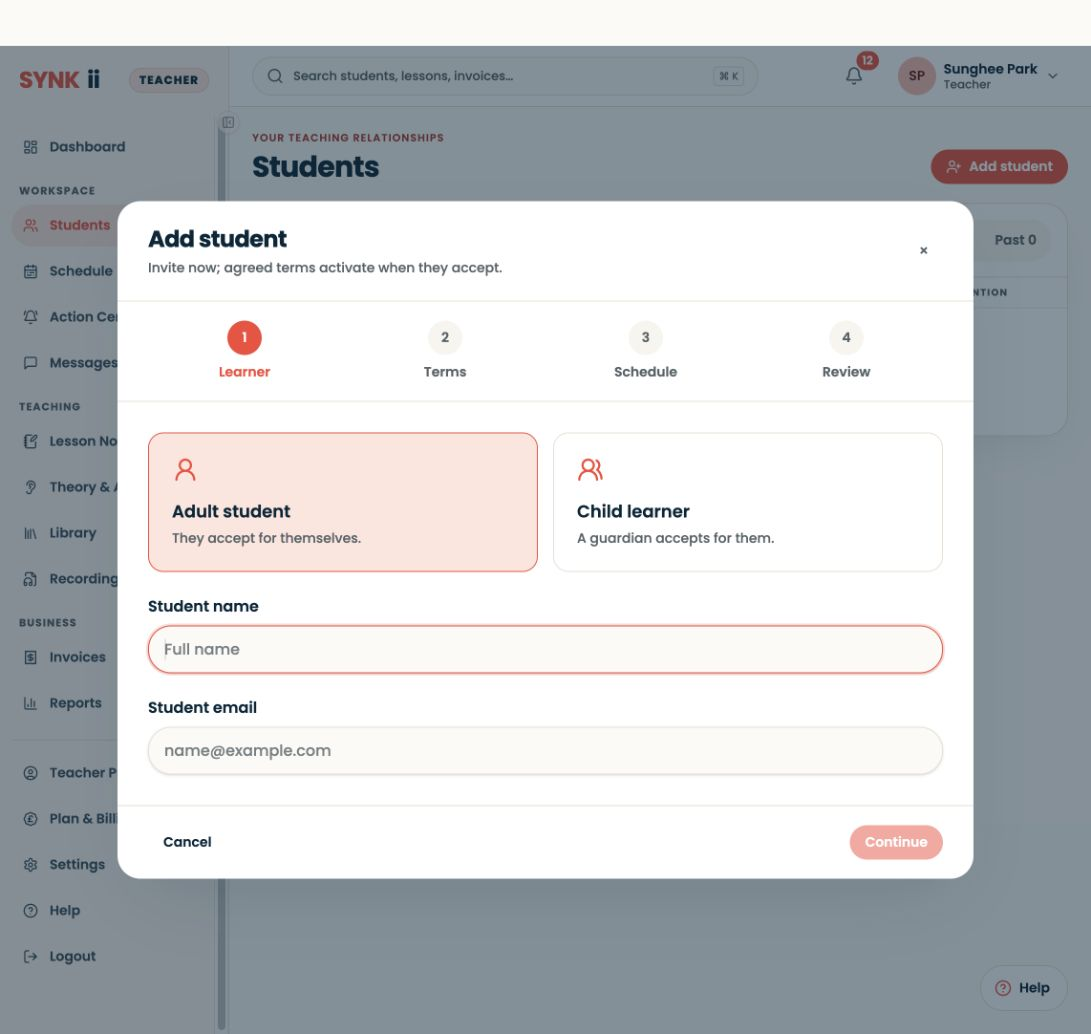
Ask the learner to open the invitation and complete the account and acceptance steps. Sending an invitation does not mean the relationship is already active. Check its status in Students before assuming the learner can use the workspace.
Child with a guardian
Use the child route and identify the appropriate guardian. The adult completes the required activation and permission steps. Keep the child’s name distinct from the guardian’s contact details; they play different roles in the relationship.
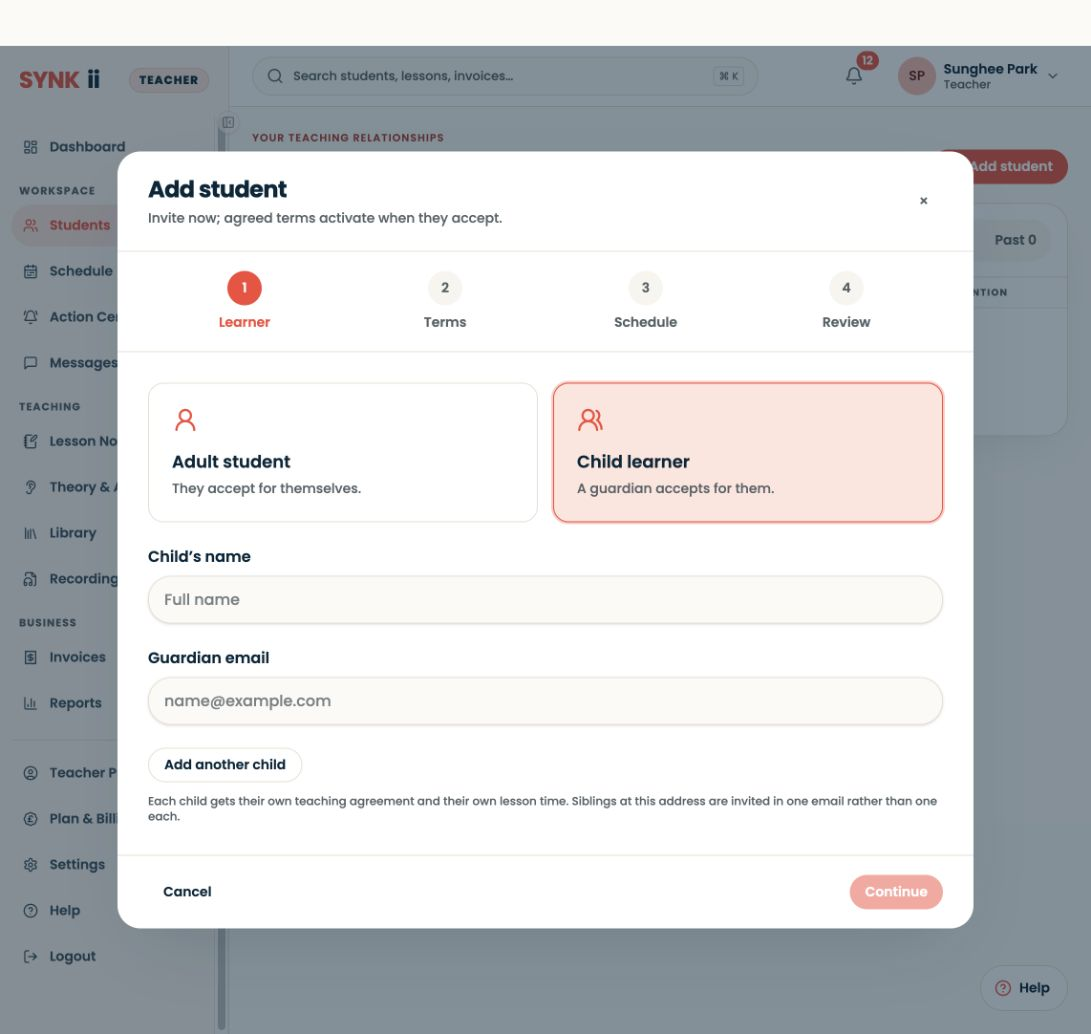
Explain this in your message: “This invitation is for you to activate and manage the learning relationship for your child. Please follow the adult account steps shown.”
Check the result
Before sending, review the proposed lesson terms. A schedule can be proposed now or set later. These terms take effect after the recipient accepts.
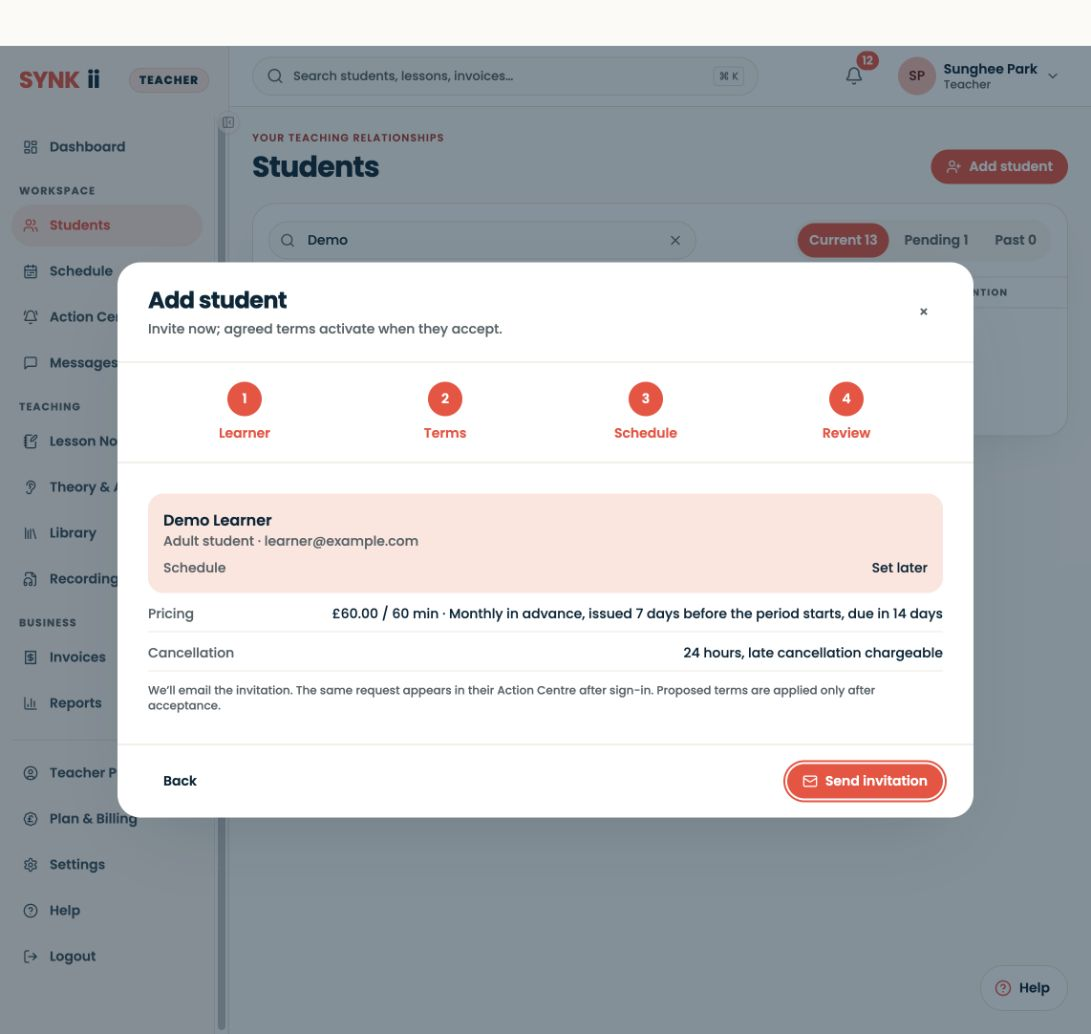
Once accepted, confirm the correct learner appears in your studio. Ask the learner or guardian to locate the next lesson and a shared resource. If an invitation remains pending, check the address and whether the intended recipient has completed the process before issuing another invitation.
Do not use a spare adult account to work around a child’s activation requirements. If the invitation has gone to the wrong person, stop and correct the relationship through the available controls or support.
A useful first message
“Welcome. Please open your invitation, check the details and complete the steps. At our next lesson we will find your notes and first practice task together.”