Keep SYNKii open in another tab. Follow the steps for your task; optional actions are labelled so you know what can wait.
Follow the numbered steps and highlighted controls. Screenshots show the actual SYNKii interface; example dates and settings may differ from yours.
1
Open your scheduled classroom
On the dashboard, find the lesson in Today’s teaching. Check the student and time, then click Enter classroom when it is available. For a lesson on another day, find it in Schedule first.
Check: The classroom for that lesson opens. Use this for an in-person lesson too.
2
Turn on AI notes
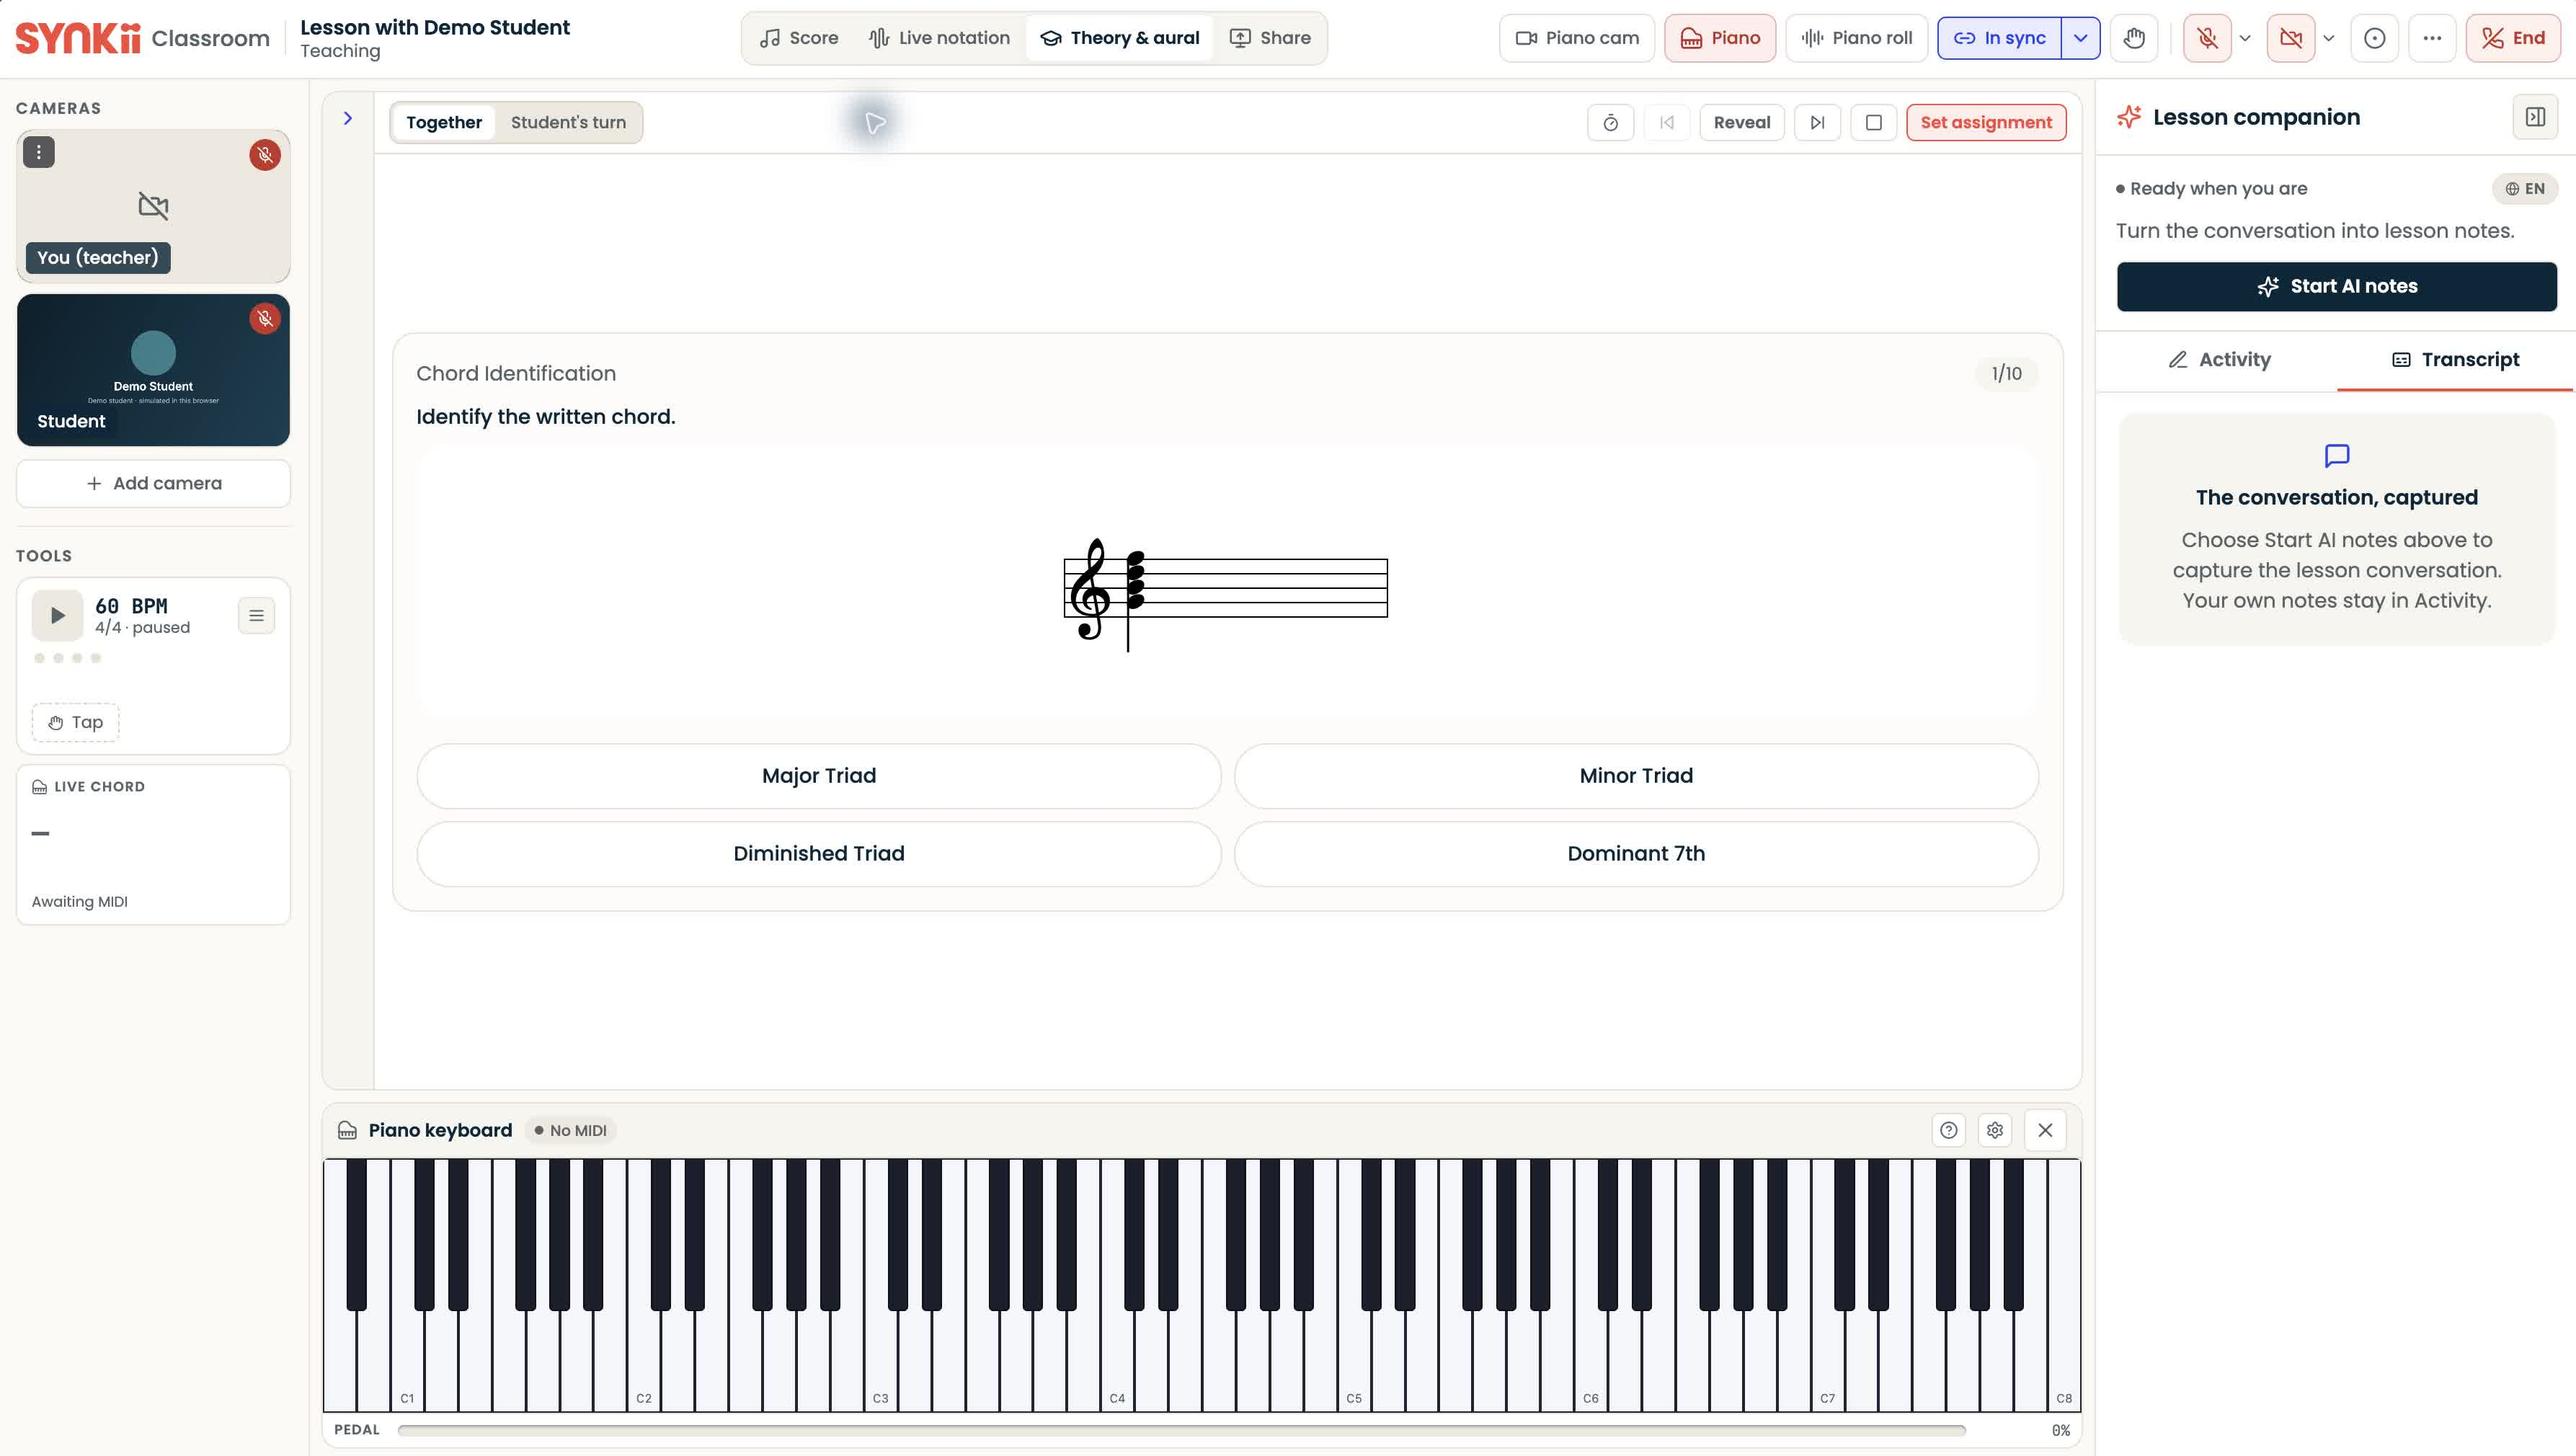
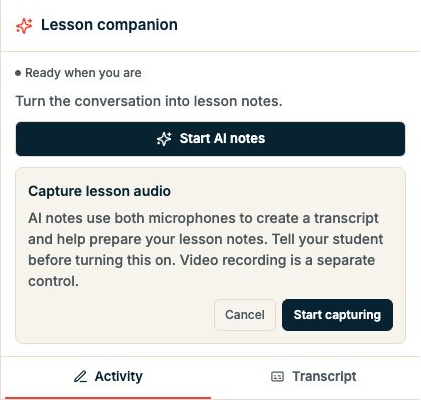
Explain audio capture to the learner, and guardian where appropriate. Choose Start AI notes, read the explanation, complete the confirmation and allow microphone access when prompted.
Open full-size screenshot ↗Platform screenshot: Start AI notes is highlighted in yellow. Read the audio explanation before choosing Start capturing. No microphone was activated for this example.
Check: Check the capture status to confirm that it has started.
3
Check capture while teaching
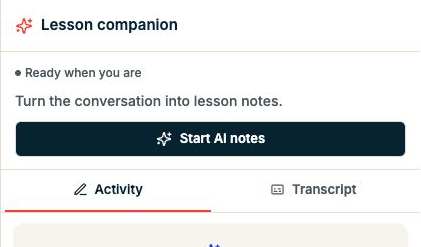
Speak naturally and name the piece and bar numbers when giving a task. If you need to stop capture, click Pause AI notes. Check the status when resuming.
Open full-size screenshot ↗Platform screenshot: Capture status appears above the AI notes button in Lesson companion. This example shows the ready state before recording starts.
Check: The status tells you whether capture is active or paused.
4
Add your own note during the lesson
*Optional — add details when needed
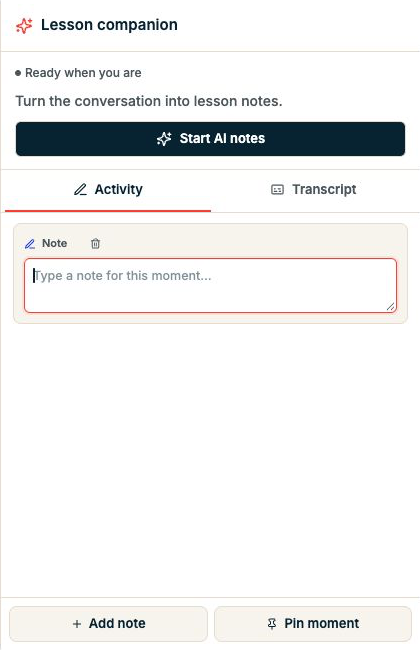
In Lesson companion, open Activity and select Add note at the bottom. Type your observation or reminder into the note field below the tabs.
Open full-size screenshot ↗Platform screenshot: Select Add note at the bottom, then type in the highlighted field under Activity. Actual classroom panel shown with an empty example note.
Check: Your typed note appears in Activity.
5
Find Lesson Notes in the menu
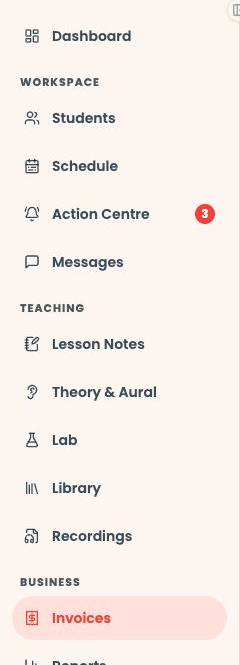
Start on your teacher dashboard. Look down the navigation menu for the Teaching heading, then click Lesson Notes. If the menu is folded away, open it first to see the names.
Open full-size screenshot ↗Platform screenshot: Find Lesson Notes under Teaching in the dashboard menu. The yellow outline marks the destination; this capture was taken from Invoices.
Check: The Lesson Notes page opens.
6
Choose the lesson
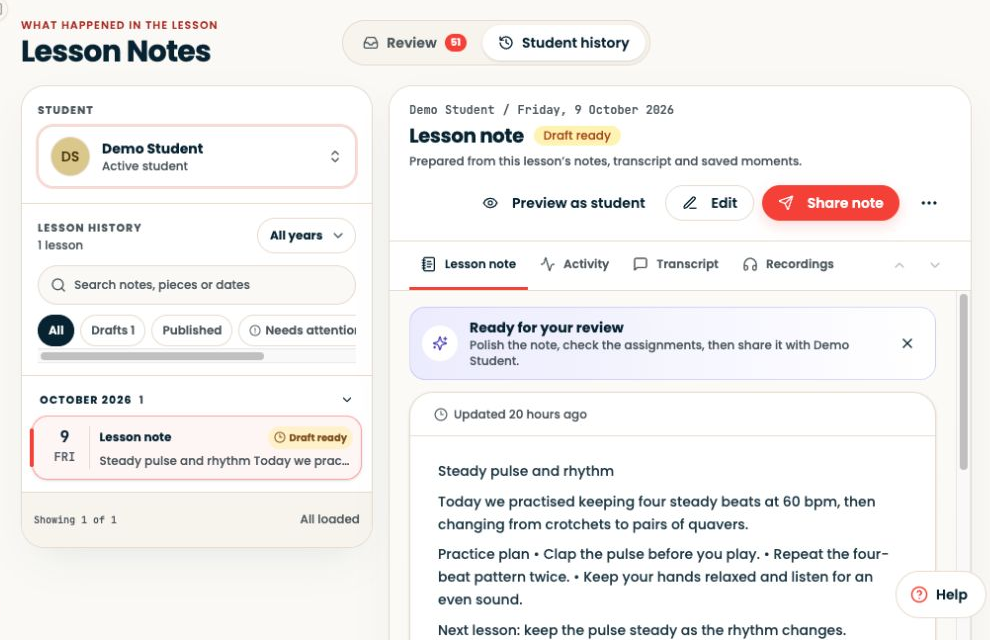
Select the learner and then the lesson you want to write about. Check the date before opening or editing a note.
Open full-size screenshot ↗Platform screenshot: Choose the student at the upper left, then a lesson from Lesson history underneath.
Check: The selected lesson and its note status are visible.
7
Review, edit and share the note
When processing finishes, read the draft. Select Edit to correct mistakes or add more detail, then save your draft. Use Preview as student to check it. When ready, press Share note so the learner can read it.
Open full-size screenshot ↗Platform screenshot: Edit and Share note are highlighted at the top of the selected lesson note. Edit changes the content; Share note makes it available to the learner.
Optional: You can keep the draft private until you are ready. Saving a draft does not share it.
Check: Look for Shared to confirm the learner can read the note.
Can’t find the same screen? Check that you are in the right account and have selected the right learner or lesson. On a small screen, open the navigation menu to see the page names. Read any access or availability message before continuing.
If capture or the draft is unavailable
Check microphone permission, capture status and any connection or usage-limit message. If capture is unavailable, write a manual lesson note.
If the draft says it is processing, wait for the result or follow the error message. Do not assume a missing draft means nothing was captured.
Help the draft be useful
Name the piece and passage naturally: “Practise bars 5–8, hands separately.” Check musical names and numbers carefully when reviewing the result. Audio transcription and video recording are separate features.
A page of corrections can make it difficult to decide what to do first. Give the learner one clear priority and keep the rest as context for future teaching.
Lesson Notes & AI1 min ↗
Illustrated explanation
A manual task should be easy to start
01
Title
Keep the pulse through bars 1–2.
02
Instructions
Tap and count once; play twice slowly.
03
Listening cue
An uninterrupted beat when the melody turns.
04
Final check
Correct learner, clear task, available score.
Illustrated assignment content, not invented composer fields.
Open Students → select the learner → Assignments to manage the work you set.
Lesson Notes & AI1 min ↗
A little choice. A clearer experience.
Your privacy, your choice.
We use essential storage to keep Synkii working. With your permission, we also use PostHog to understand page use and measure which campaigns lead to signups. No session recordings.