Keep SYNKii open in another tab. Follow the steps for your task; optional actions are labelled so you know what can wait.
Follow the numbered steps and highlighted controls. Screenshots show the actual SYNKii interface; example dates and settings may differ from yours.
1
Find Lesson Notes in the menu
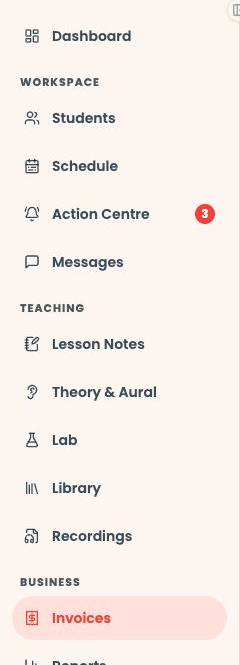
Start on your teacher dashboard. Look down the navigation menu for the Teaching heading, then click Lesson Notes. If the menu is folded away, open it first to see the names.
Open full-size screenshot ↗Platform screenshot: Find Lesson Notes under Teaching in the dashboard menu. The yellow outline marks the destination; this capture was taken from Invoices.
Check: The Lesson Notes page opens.
2
Choose the lesson
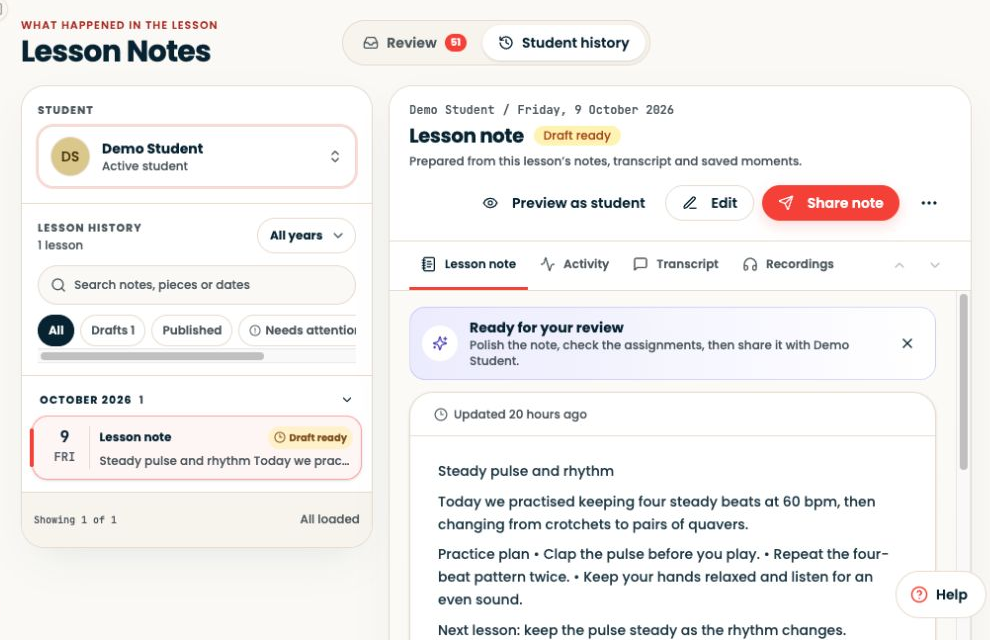
Select the learner and then the lesson you want to write about. Check the date before opening or editing a note.
Open full-size screenshot ↗Platform screenshot: Select the student and lesson in the left column. This example uses Demo Student.
Check: The selected lesson and its note status are visible.
3
Open the editor
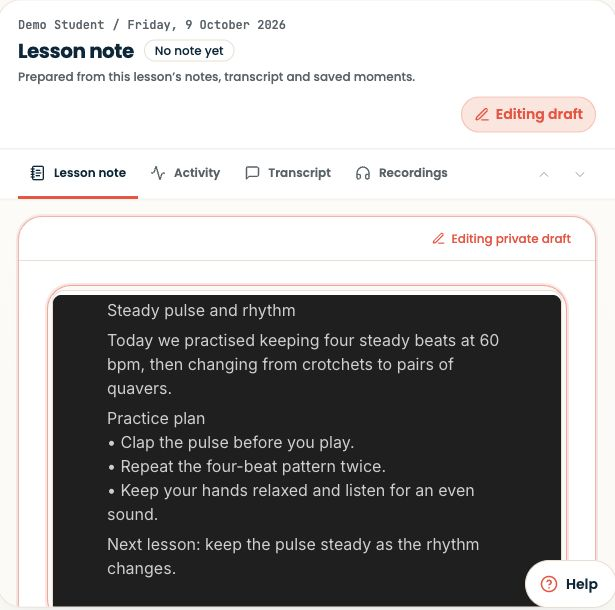
Choose Write note, or Edit for an existing note. Briefly state what you covered and one practice task, naming the material, page or bars. You do not need an AI transcript.
Open full-size screenshot ↗Platform screenshot: The actual private draft editor with fictional lesson guidance.
Check: Your text is visible in the note editor.
4
Save your work
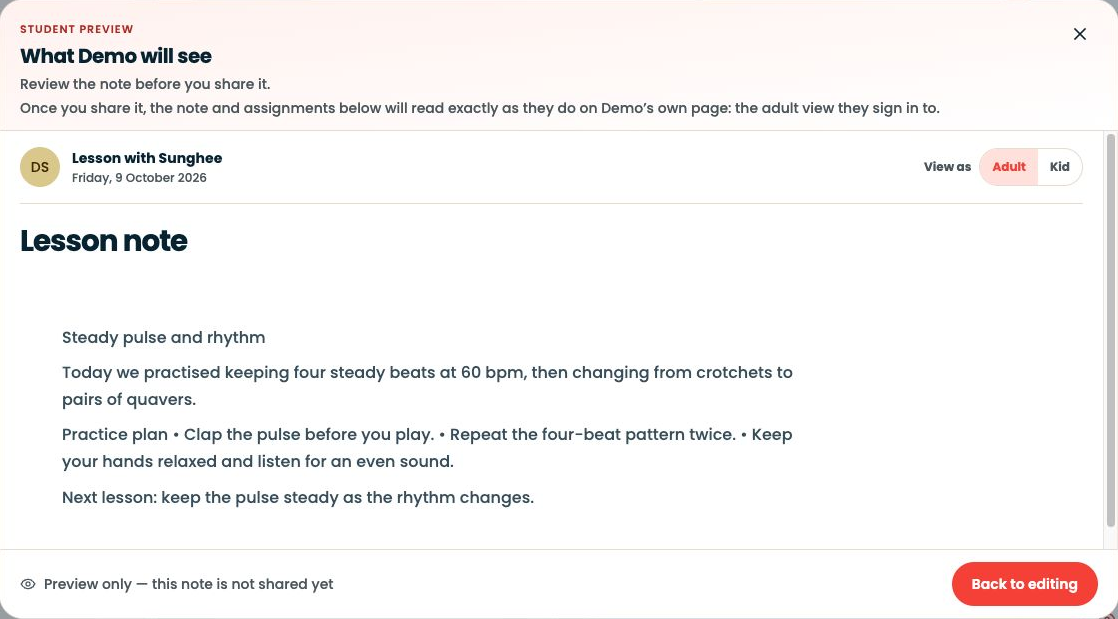
Read through what you wrote, then click Save draft when shown. Wait until saving has finished before leaving the page.
Can’t find the same screen? Check that you are in the right account and have selected the right learner or lesson. On a small screen, open the navigation menu to see the page names. Read any access or availability message before continuing.
A short note is enough
For example: “Open Four-bar study. Practise bars 1–2 with the fingering we agreed. Try two careful repetitions and listen for a steady join.”
Use the same title as the shared Library file. Keep private observations out of student-facing notes.
Want a tracked practice task?
Set an assignment separately if you want the work to appear in the student’s assignments. Writing instructions in a note does not configure a digital exercise or its completion settings.
A page of corrections can make it difficult to decide what to do first. Give the learner one clear priority and keep the rest as context for future teaching.
Lesson Notes & AI1 min ↗
Illustrated explanation
A manual task should be easy to start
01
Title
Keep the pulse through bars 1–2.
02
Instructions
Tap and count once; play twice slowly.
03
Listening cue
An uninterrupted beat when the melody turns.
04
Final check
Correct learner, clear task, available score.
Illustrated assignment content, not invented composer fields.
Open Students → select the learner → Assignments to manage the work you set.
Lesson Notes & AI1 min ↗
A little choice. A clearer experience.
Your privacy, your choice.
We use essential storage to keep Synkii working. With your permission, we also use PostHog to understand page use and measure which campaigns lead to signups. No session recordings.