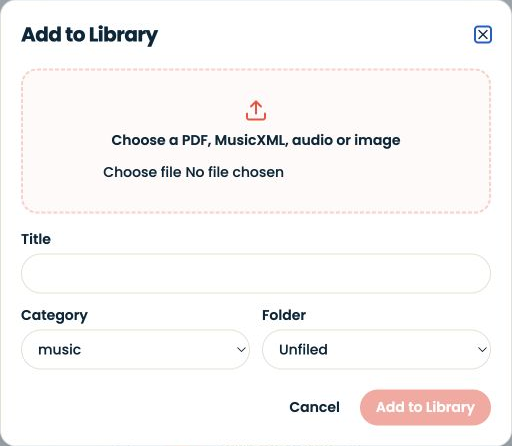
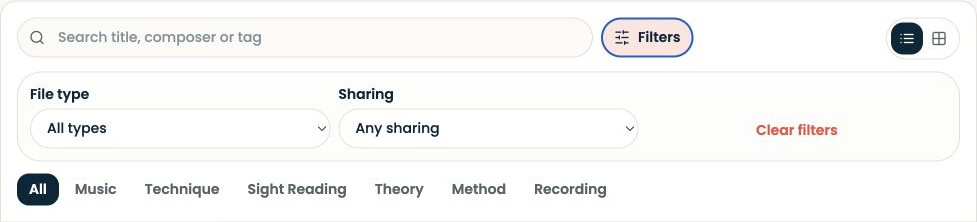
The slides show the actual upload form and Library filters. They do not show a completed upload, a student sharing list or a verified learner account.
Written walkthrough
Open Library, then Add material. Choose a file you have permission to use: PDF, MusicXML, audio or image. Give it a title the learner will recognise, such as “Five-note study — C major — score”. Choose an appropriate category and folder.
Step-by-step explanation
Add the material. Check the file and title before adding it. A clear title makes it easier to connect the resource to the instruction in a lesson note.
Find it again. Search by title, composer or tag. Open Filters to narrow by file type or sharing, and use the category tabs when you know the kind of material you need.
Check the content. Open the uploaded item before sharing. For a score, inspect the clef, page order and passage. For audio, listen to the file so you know it contains the intended demonstration.
Share with the intended learner
Use the item’s sharing controls for the correct teaching relationship. Uploading and sharing are separate actions. Verify the learner can open the resource rather than assuming that adding it to your library gives every student access.
Connect the file to a specific task: “Open the C-major study and work on bars 1–2.” The learner should understand both where to begin and what to listen for.